
Signs of Life Base Building: Rooms, Walls and Stations
How base building works in Signs of Life: valid room sizes, walls, doors, lighting, station layout and the mistakes that waste materials.
A colony room needs an interior of at least 8 by 4 tiles, background walls, a bed, a door or hatch, and a working light. Stay under 32 by 16 tiles.
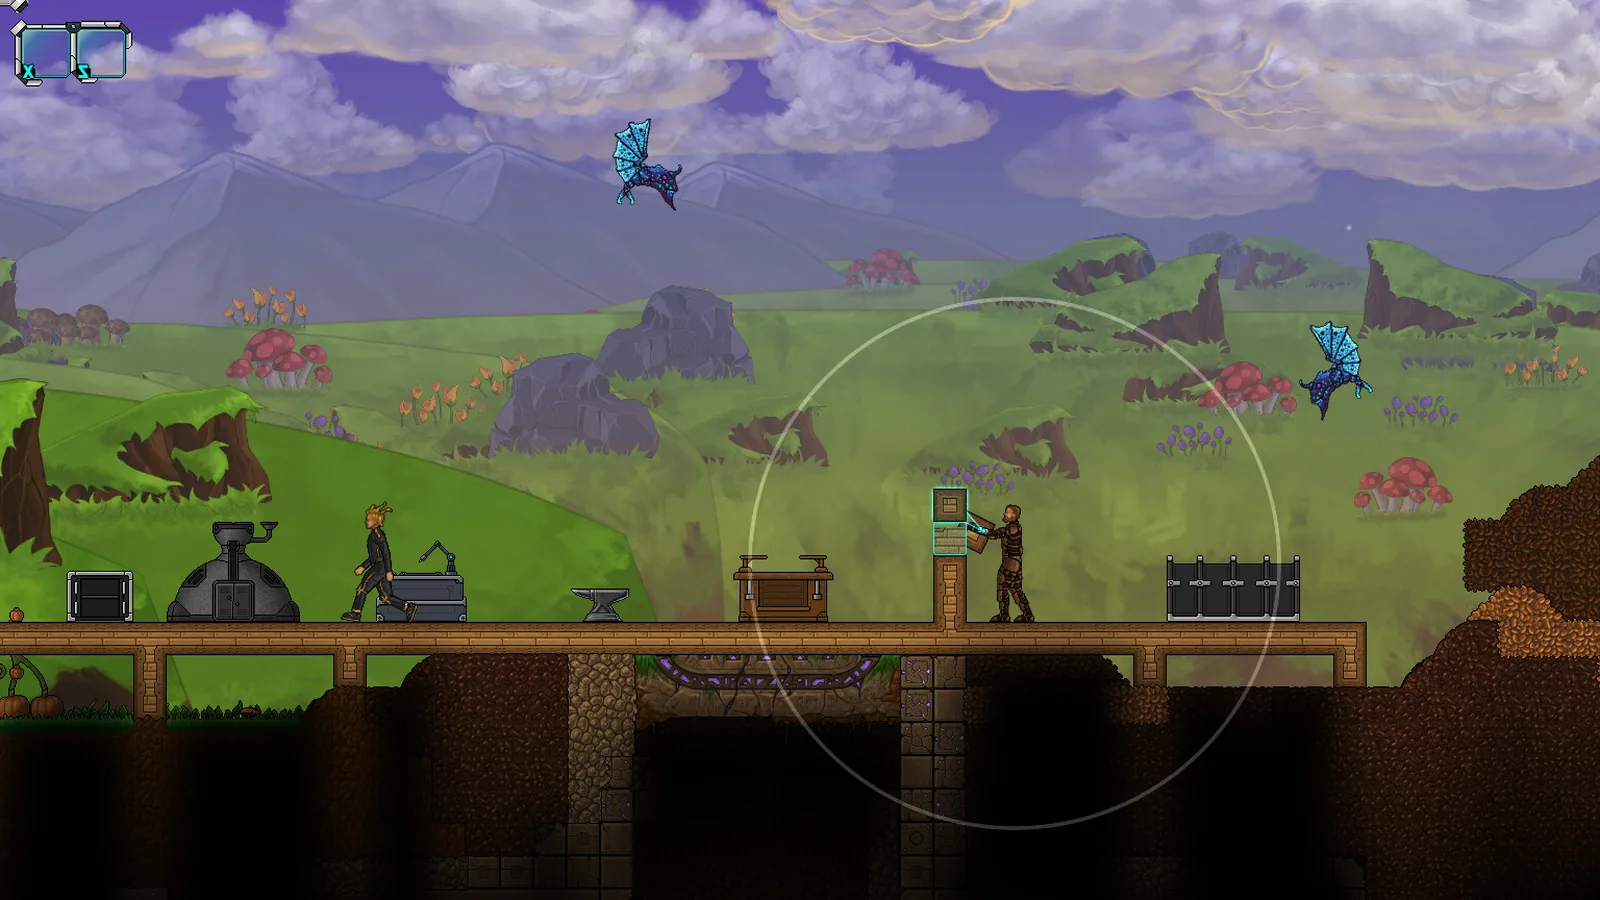
Base building in Signs of Life looks like free-form tile placement, but the game quietly checks for rooms. That check matters for colony management, for powered stations and for keeping your crafting area organised. Players who build a decorative shell without background walls end up wondering why a workstation will not accept a room assignment.
This guide covers the construction rules first, then a layout that works for solo and two-player bases.
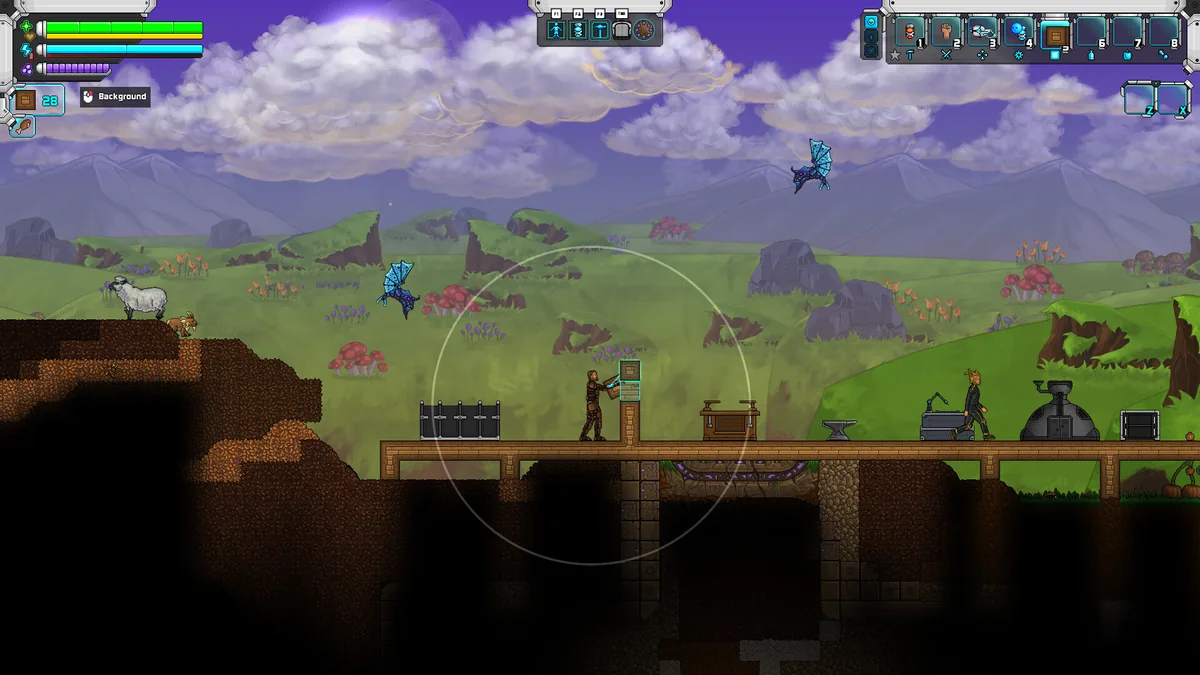
A good base separates storage, crafting and power.
The room rule, exactly
The 1.0 colony system defines a valid room with five requirements:
- Interior size: at least 8 tiles wide and 4 tiles high.
- Maximum size: no more than 32 tiles wide and 16 tiles high.
- Background walls: the interior needs a wall layer behind the open space.
- Furniture: at least one bed.
- Access and light: a door or hatch, plus a working light.
Rooms inside the Hephaestus do not count. That means the ship is a tutorial and story space, not a colony. Your first real room belongs on Osiris.
The size rule is a range, not a target. A 8 by 4 room is cramped but valid; a 16 by 8 room holds a work table, furnace and several chests comfortably. The 32 by 16 ceiling exists so a giant open hall cannot count as a single room.
Start with one workshop room
The first room should do three jobs: craft, smelt and store. A practical layout:
- Left side: Basic Work Table and a later upgrade.
- Centre: Draft Furnace, replaced by a Blast Furnace when you can afford 12 iron ingots.
- Right side: three chests for raw materials, intermediates and gear.
- Back wall: background walls, with a bed in a corner.
- Front: a door, with a light above it.
Leave a two-tile walking path between stations. The game does not require it, but you will carry a lot of ore through this room.
Walls, backgrounds and doors
Background walls are the most commonly missed requirement. They are a separate layer from the solid walls that enclose the room. If you place a door and a light but no background wall, the room may still function as shelter, but it will not satisfy the colony check.
Doors and hatches both count as access. Use a hatch if you are building into a hill or connecting to an elevator shaft. Elevators are useful for deep bases, but they add complexity; a simple ladder or stair shaft is easier for a first build.
Lighting is functional
A working light is not decoration. It is part of the room validation. Place at least one light inside the room and make sure it has power if the light requires it. If a room stops counting after a rebuild, check the light first.
For visibility, place lights at the corners of large rooms rather than one in the centre. The game's pixel art has strong contrast, and corner lighting makes the floor easier to read.
Station placement
Stations have implicit workflow. Put related stations next to each other:
- Smelting cluster: Draft Furnace or Blast Furnace beside the ore chest.
- Cooking cluster: Campfire or Brick Oven beside the food chest.
- Chemistry cluster: Chemistry Bench or Lab beside the material chest.
- Ammunition cluster: Ammunition Press beside the ingot and chemical storage.
This is not just convenience. In co-op, a clear layout lets a second player find the right station without asking. Label chests with signs or use separate rooms.
Storage that scales
A single chest is enough for the first hour. By the end of the first week you want at least:
- Ore and stone: raw copper, tin, iron, coal, stone.
- Organics: plant fiber, hide, bone, food.
- Ingots and parts: copper, bronze, iron, steel, plates, wire.
- Gear: weapons, armour, tools, accessories.
- Quest and alien items: datapads, artifacts, Xenoid loot.
Pneumail shared storage becomes available later. It is excellent for colony output, but it is not a replacement for a labelled chest wall. Use both: Pneumail for produced goods, chests for materials you are actively crafting with.
Defences without overbuilding
Turrets are part of the automation layer, not the first-day build. A wall of turrets around a starter hut wastes resources that should go into a Blast Furnace. Build defences when you have something worth defending: a colony, a deep base or a co-op world that runs while you are offline.
If you do build defences, place them where enemies path rather than around the entire perimeter. A choke point with two turrets is better than twenty turrets spread across a plain.
Co-op base rules
Co-op worlds are host-owned. Shared containers, doors and elevators are supported, but the host saves all building changes. Before you start a shared base:
- Agree on a host and a play schedule.
- Decide who owns which chests.
- Build rooms large enough for two players to work without blocking each other.
- Put the bed near the entrance so a respawning player can rejoin quickly.
- Avoid building over the host's spawn point.
The co-op guide→ covers roles and etiquette in more detail.
Common building mistakes
Building too big too early. A 30 by 15 hall with one work table is a waste of walls. Build small, expand when a station needs space.
Forgetting the background wall. This is the most common reason a room does not register.
Putting the bed in a separate room. The room check wants a bed in the room itself. A bedroom can be its own room, but your workshop also needs a bed if you want it to count.
Blocking the door with storage. Leave a clear path. You will carry ore through that door hundreds of times.
Building on the Hephaestus. Ship rooms do not count toward colony requirements.
Ignoring vertical space. The minimum height is four tiles. A three-tile-high corridor is a corridor, not a room.
When to rebuild
Rebuild when a station no longer fits, when you start the colony layer, or when you move from solo to co-op. Do not rebuild for aesthetics alone. The game rewards function, and a compact base with a Blast Furnace will outperform a beautiful base with a Draft Furnace.
The base locations guide→ explains where to put the base in the first place. The power guide→ covers powered rooms and batteries.
Official source: Sweet Dog Studios, Update 27 patch notes (colony room requirements) and the official wiki structure reference, checked 10 November 2026.
Sources and further reading
- Update 27 patch notes ↗ - colony room rules and powered operations computer
- Official wiki structures ↗ - station and structure reference
- Steam store page ↗ - base building feature overview
- Official Signs of Life site ↗ - game overview
FAQ
What size does a room need to be in Signs of Life?
At least 8 tiles wide by 4 tiles high, and no more than 32 by 16 tiles. It also needs background walls, a bed, a door or hatch, and a working light.
Why is my room not counting?
Check for background walls first, then the bed, door and light. Rooms on the Hephaestus never count.
Can I build a base anywhere?
Yes, within the generated world. Practical concerns are ore access, flat ground and distance to story locations.
Do I need turrets early?
No. Spend early resources on crafting stations and a Blast Furnace. Add turrets when you have a colony or a base you leave unattended.
Related Signs of Life Guides
Choosing a Signs of Life base location: ore access, flat ground, biome hazards, story travel and the best spots for a first or late-game base.
A Signs of Life crafting guide: work table tiers, furnace upgrades, hammer requirements, recipe chains and how to organise production.
How power works in Signs of Life: wireless batteries, fuel cells, battery chargers, power cores and the colony's powered operations computer.
Every major Signs of Life 1.0 change: the ending, Xenoid cities, colony management, rebalanced gear, controls and co-op fixes.
The Signs of Life achievement list with global unlock rates, the gemologist chain, the joke achievements and a practical completion route.
How the Signs of Life alien language works: scan inscriptions, build understanding, unlock Xenoid dialogue and extract seven archive records with AGIS.
More Signs of Life Guides
How armor works in Signs of Life, the best early and late sets, Ghost Hide and Energy Plate bonuses, mining suits and co-op gear priorities.
Automate a Signs of Life base with turrets, Pneumail shared storage, drone accessories and post-game colonist jobs, without wasting power.
Practical Signs of Life tips for new players: scan everything, manage stamina, build one good room, and avoid the early base traps.
A tour of Signs of Life biomes: grasslands, purple alien terrain, caves, ruins, Xenoid cities and the late-game New Earth areas.
The major Signs of Life boss fights, the order to attempt them, gear checks and arena tips, plus a pointer to the Buff Mechington Mk2 strategy.
How to beat Buff Mechington Mk2 in Signs of Life: the glowing weak points, head-tail-chest order, the three-second chest window and co-op tactics.
How Signs of Life co-op works: Steam friend hosting, drop-in play, character transfer, shared storage, PvP settings and role splits for two players.
How the Signs of Life colony works: Pioneer Station computer, room requirements, colonist jobs, Pneumail storage and new-world requirements.